|
GlueScan™ AOI Adhesive Dot Inspection System |
|
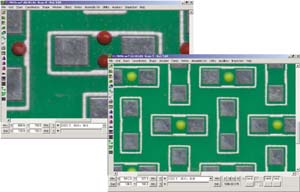
 WHAT IS GlueScan? GlueScan provides a simple and user-friendly alternative to inaccurate and time-consuming manual inspection methods or expensive, high-end AOI systems. GlueScan uses a simple Windows user interface integrated with an automatic table and image-processing unit. This combination allows 100% inspection of adhesive placement on PCBs after stenciling, dispensing or stamping. HOW DOES GlueScan WORK? GlueScan's integration within the production line provides 100% verification of absence / presence of glue dots before entering the placement environment. Each PCB or substrate is placed from the dispensing or printing machine into GlueScan for 100% inspection. The PCB is then accepted and returned to the surface mount machines or rejected. No more surprises! QUICK & SIMPLE PROGRAMMING GlueScan is quickly programmed from a golden board in just a few minutes. INCREASE YIELD & IMPROVE OVERALL EQUIPMENT EFFICIENCY Missing adhesive can result in very expensive equipment repairs, lost production time and extensive rework. GlueScan's powerful inspection process increases product yield by ensuring accurate glue deposition. Thus, assisting with secure component placement and eliminating potential damage to nozzles and other delicate placement machine elements. Missing glue dots are automatically detected. Problems are detected and eliminated early in the production process! SIMPLICITY GlueScan set up is fast and easy. In production, each board is placed on the automatic table, is shuttled in, automatically aligned and checked for accuracy with a PASS or FAIL inspection in seconds. |
WHY USE GlueScan?
DESKTOP MODULE Off-line Inspection  System Specifications
*Recommended customer supplied minimum PC requirements  CONVEYOR MODULE In-line Inspection System Specifications
Specifications subject to change without notice. |